How to Remove Stretch Marks in Photoshop

This is a super brief tutorial covering how to remove stretch marks from skin in Photoshop. No body enjoys talking about stretch marks, but more than likely most of us will encounter them. Therefore, it is a good idea to know how to remove them.
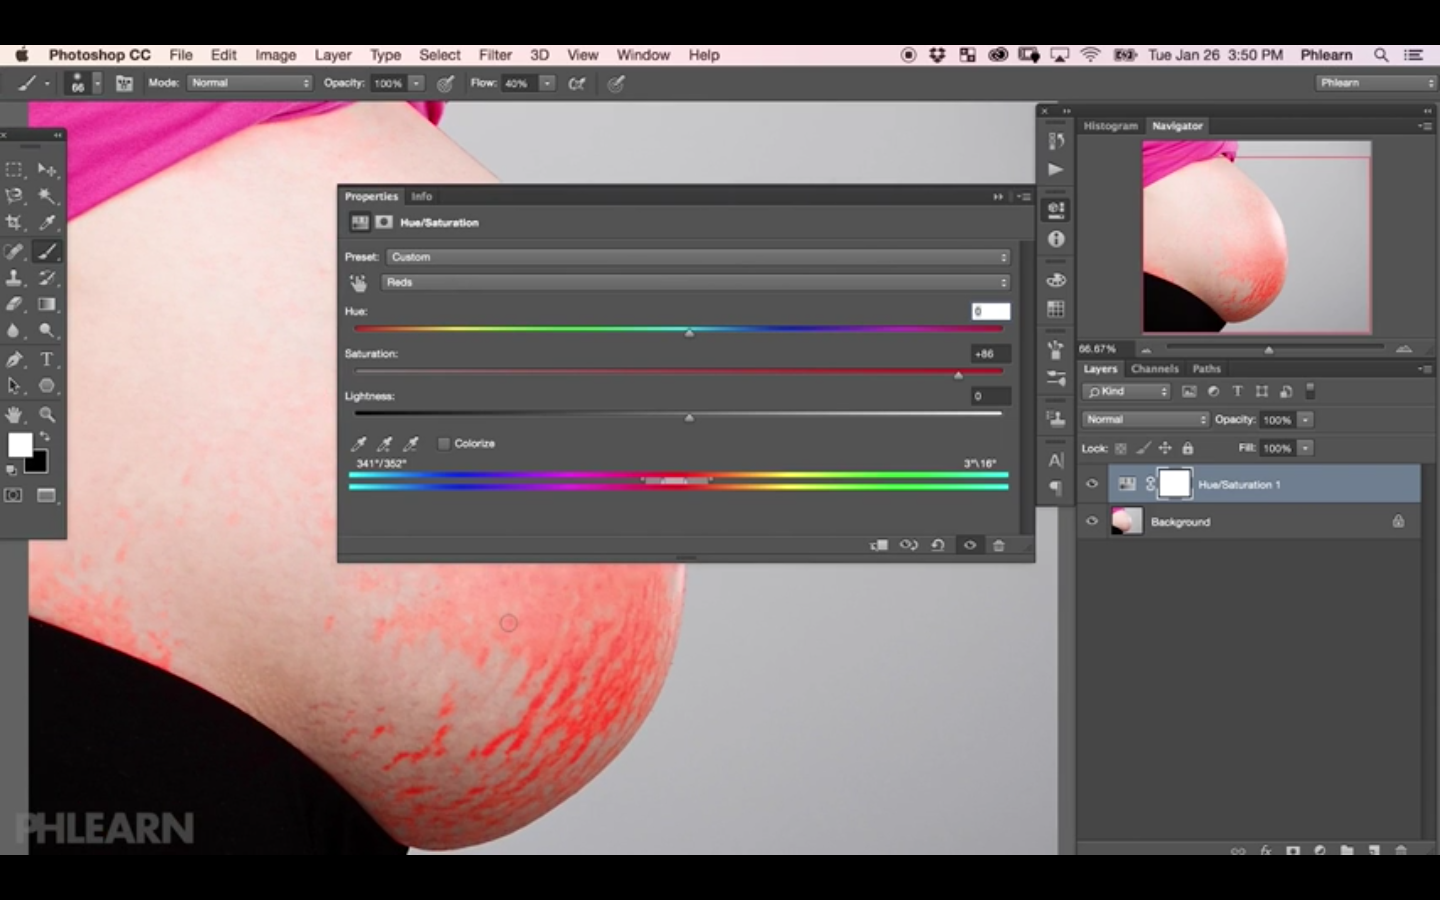
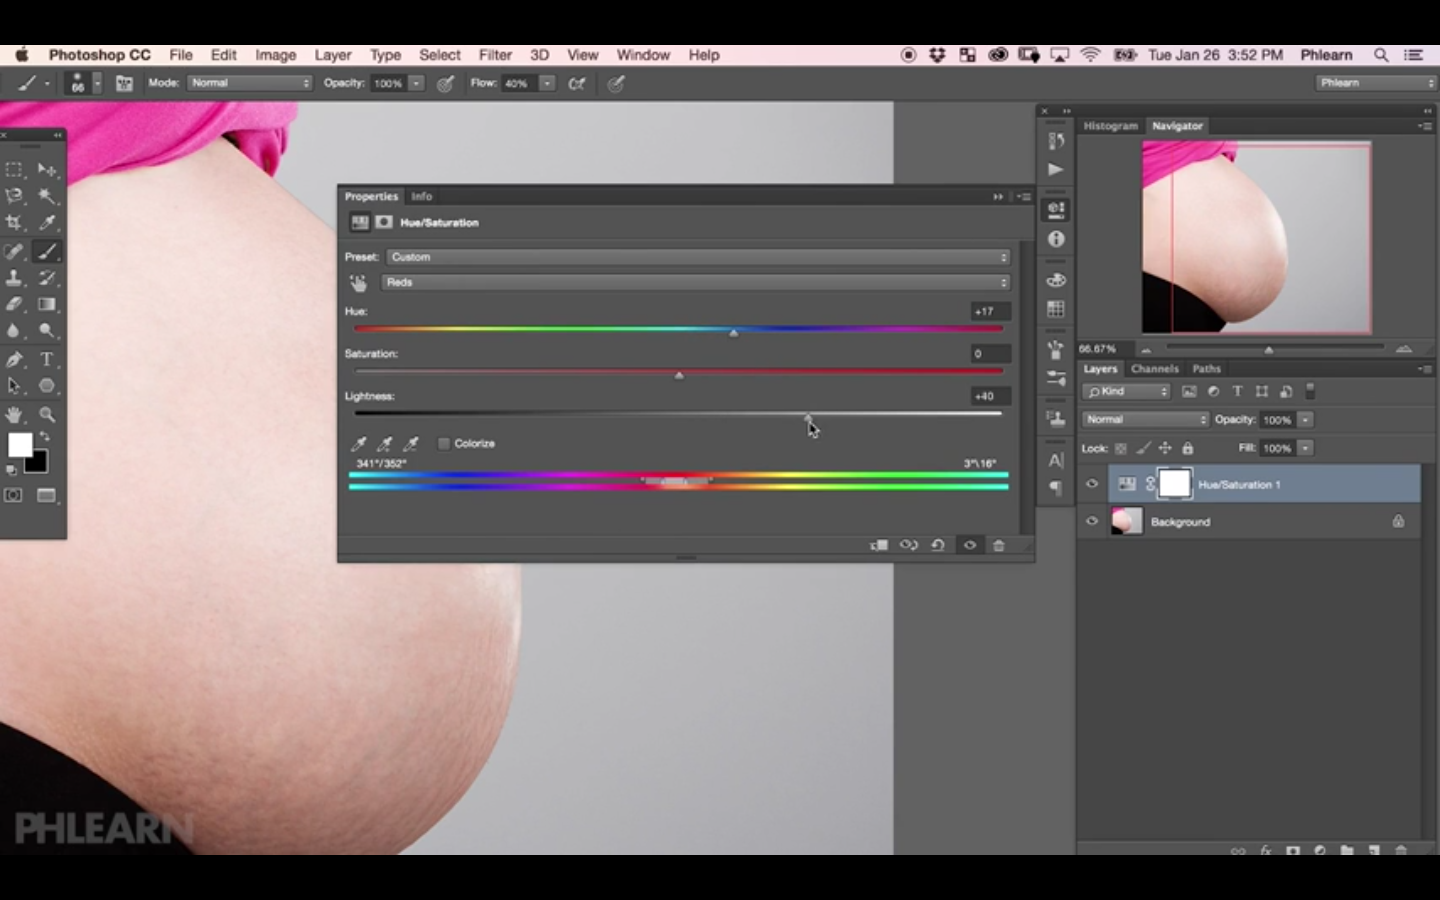
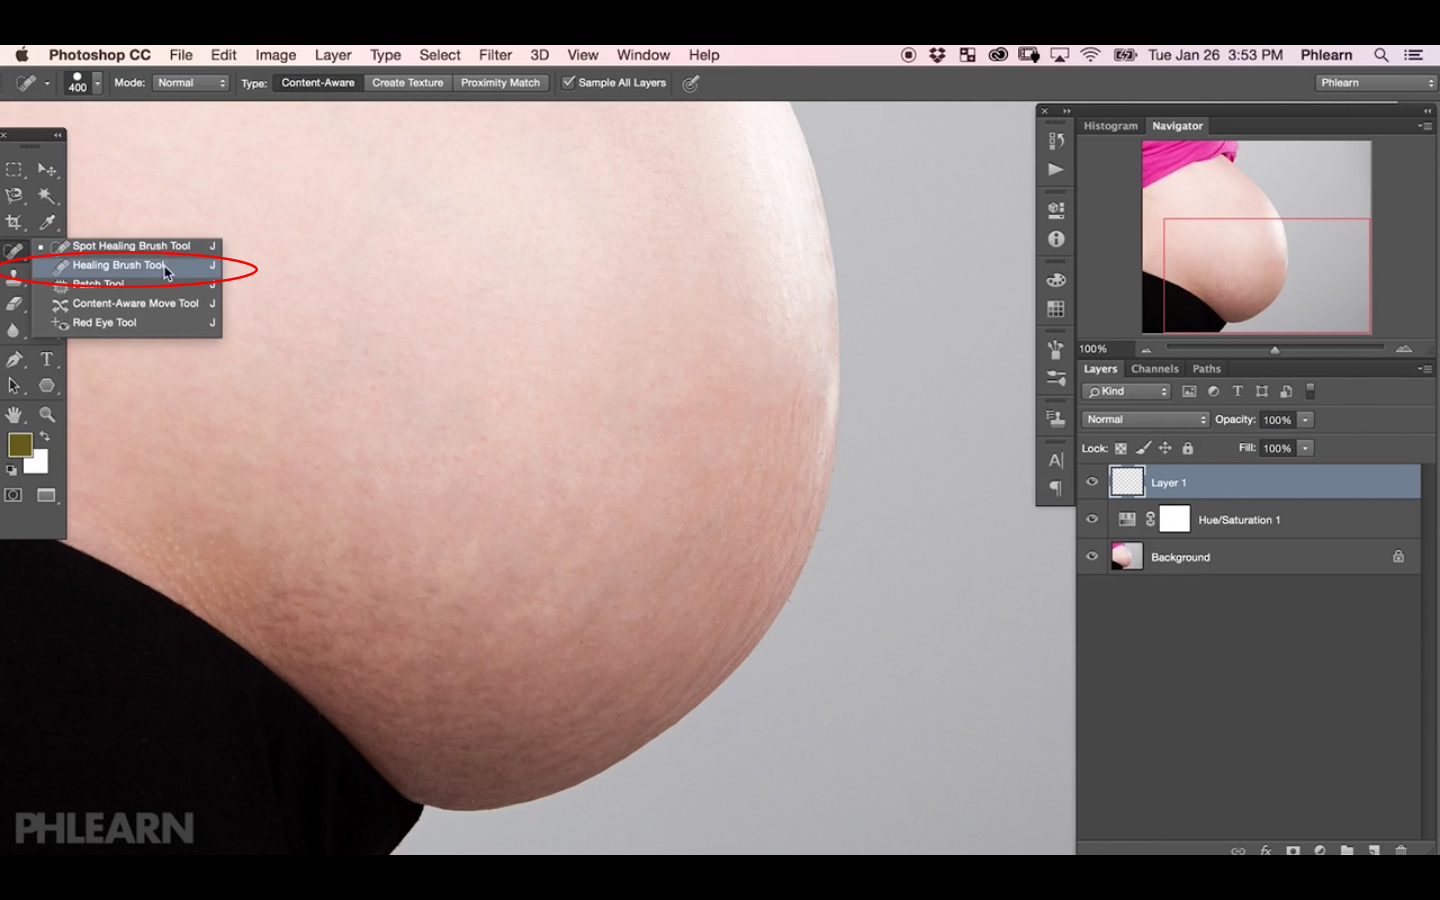
Stretch marks are often a different color from the skin depending on the skin complexion. One common color of stretch marks on lighter skin is red. In this video, Aaron Nace of Phlearn will show how to target the color of the stretch marks to begin removing them. He begins by opening the Hue/Saturation Layer Adjustments. With the Reds setting selected he uses all four sliders to begin changing the color of the stretch marks to where they blend with the rest of the skin. After that, Phlearn goes in with the Healing Brush Tool on a new layer to heal away the marks on the skin. When doing this step, make sure you check Sample All Layers in the Tool Options Panel of the Healing Brush Tool. That's pretty much it, very easy!
Phlearn's Website | Facebook | Instagram | Twitter
If you enjoyed this video or want to share some tips and tricks of your own, please comment below or shoot me a message on my contact page! Make sure you share with your friends as well. Also, if you have practice work you want me to see, feel free to tag me to your posts on Facebook or Instagram. Thank you for watching!